Share
Pin
Tweet
Send
Share
Send
Huichi belong to nature with a special thrill. Center of the mandala - the square symbolizes 4 elements: earth, fire, air and water. According to the legends of the Indians, Ojo de Dios is able to heal and preserve. It is hung on the wall and used in various ceremonies. In general, the Ojo de Dios amulets are destined to bring good luck.
Now one person is known in the world who creates the most beautiful and unique mandalas, he made it his art, his name is Jay Mohler. You can be inspired by his work by visiting his page on the Internet, and if you wish, you can even purchase one of his charms.
A few words about the materials.
It is best to use natural materials - wood and wool. If possible, yarn should not be very “shaggy”; acrylic, cotton and wool are perfect. As rails, you can use toothpicks, barbecue skewers. This is great for small mandalas. Reiki for large mandalas can be found in construction markets and in construction stores.
In addition, it will be very beautiful if you decorate your amulet. For this purpose, you can use beads, decorative feathers, buttons, ribbons, beads and so on. The main thing is not to be afraid to show imagination. I suggest you weave such a mandala.
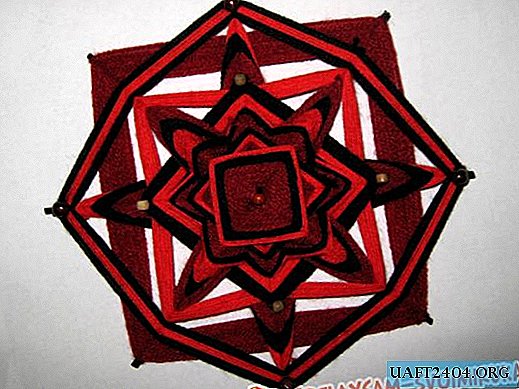
Thus, you will have an idea about the simplest weaving of ojo do dios mandalas. You can choose a color combination at your discretion, the main thing is that the colors are combined with each other. So let's get started.
1. We take 2 slats and fix them exactly in the middle with a thread in a few turns.

First we fix the thread with a knot, and then several times wrap it around both rails.
2. Turn the fixed rails crosswise and wrap several times diagonally. First, on the one hand, then on the other.


The main thing is that the slats hold tight and do not fidget. Wrap as many times as necessary.
3. Now we need to make squares on our 2 rails. I will do the same color, but you can take another. It is necessary to wrap the thread around each rail in a circle. We wrap around one rail, laying the thread on top. We make a turn.

When the thread is again upstairs, we transfer it to the second rail and so on.

We do this until we get a square. The size of the square is up to you. It should be like this.

We fix the thread and cut it on the wrong side.

In general, we make all the nodes inside out so that they are not visible.
4. I have this top square, I want the center to be more interesting, so I take a thread of a different color, knit it on any of the rails and repeat the third point. It turns out like this.

5. I take a thread of one more color and once again I repeat the 3rd point. It turns out like this.

6. Now we need to make the bottom square. It should be slightly larger than the top. The principle of operation is the same as with the top. We take 2 other slats and a thread and repeat 1-3 points. Again, I used 3 colors. As a result, we get 2 such squares.

7. Now we need to connect them together. One square on top (smaller), 2nd on the bottom. This is perhaps the most crucial and difficult moment in the whole weaving, as it must be done so that everything is smooth and accurate and the squares do not part. We put one square on top of the other and, pressing the top in the middle with a finger, we attach the thread to one of the rails of the lower square, while leaving the tip so that we can tie this thread later.

In general, the work process is similar to the third point, only now, having wound the thread around one of the rails, we skip it under the next two rails and wrap it again and so on in a circle.

It is very important that the squares do not disperse and monitor the thread tension. We wrap it around in such a way 10-15 times until we feel that the structure is strong and does not separate. We stop on the stick to which the thread was tied at the beginning and we connect the “working” thread with the “tail” left by us. It should be something like this.

And so it looks from the inside out.

8. Now we take a thread of one more color and we repeat all the same actions, wrapping through 2 sticks. Like this.
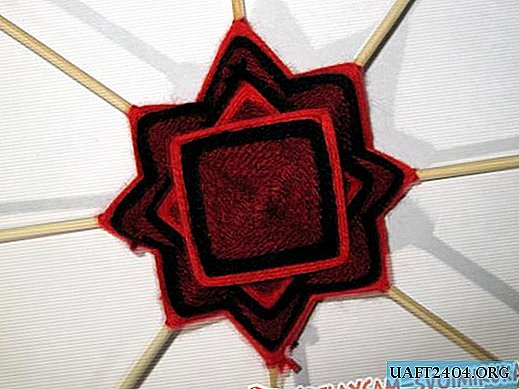
9. Next, weave the next element, I will conditionally call it "petal". All you need to weave 2 "petals". We tie the thread, as in the photo.

We skip under the mandala and wrap around the opposite end of the rail. Then again we skip under our mandala and again wrap the opposite end of the rail. We do this until we are satisfied with the result. The main thing to remember is how many full revolutions we made. This is necessary in order to weave a second symmetrical "petal". I got 6 full turns.

10. Tie the thread to another stick and again do 6 turns.


11. Now I want to repeat both “petals” with another color. I made 10 windings on 2 "petals".

12. I take a different color and repeat paragraph 11. This is how it happened.

13. Next we will weave the square element. We tie the thread, as in the photo.

We pass it from below through one rail and wrap the next rail, throwing a thread on top.

And so in a circle. Here's what happened.

I take a thread of a different color and repeat the same.

14. Repeat the same operation on the upper square, that is, now we attach the thread to the stick of the upper square and repeat step 13. It turned out like this.

15. Next, I again weave the "petals", but already on the bottom square. 12 turns with a thread of one color, 12 threads with a different color and a fringing of 10 turns with a thread of 3 colors. Like this.

16. The next element is the "octagon", that is, I simply tie a thread on one of the rods and wrap each rail in a circle. I wrapped 3 times with black thread, 5 red and again 3 black. Like this.

17. Next, I weave another “square” on the top with a thread of a different color. Our mandala is ready.

18. We cut off the excess ends of the rails. Something is missing, right? For greater beauty, I painted the ends of the rails with a marker so that they do not stand out strongly and decorated the mandala with beads.

Share
Pin
Tweet
Send
Share
Send

