Share
Pin
Tweet
Send
Share
Send
It may also be necessary to replace a block, or upgrade, to upgrade equipment to more modern ones. Sometimes you can replace something without removing the motherboard, but sometimes it is necessary for convenience and from the likelihood of damage to the element when bent during installation. When the board is removed, it is possible to support it from the back, preventing such bends.
Cover removal.
Yes, to get inside the system unit, you need to remove one, and sometimes better two side covers of the case. How to do it? There are specific screws on the back of the system unit, two for each cover. Any small screwdriver, whether it be a Phillips or a straight one, unscrew them.
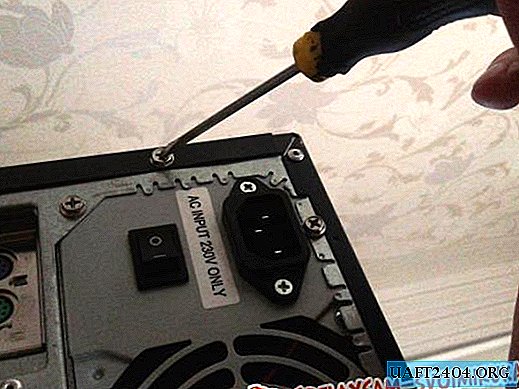
Almost all models of cases on the covers have special recesses, for which you should pull back. This will release the latches and the sides can be easily removed.

Now the whole "stuffing" of the electronic machine is gaping in front of you.

Training.
If you still decide to completely disassemble your PC, then first of all you need to disconnect the cords. There are a lot of them and they are of different appearance. Usually on the side of the connector there is a latch that needs to be released by pressing. If this is not done, you can break the connector, which can lead to a replacement of the motherboard. Therefore, you need to be careful, and before removing, carefully inspect the junction.


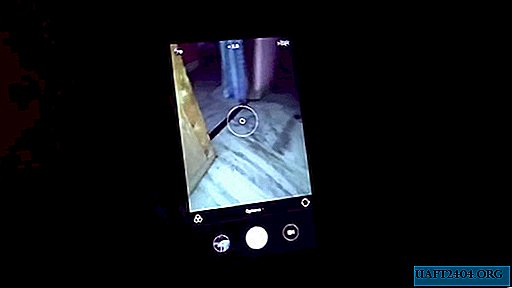
To remember where which wires were and in what position, it is better to use a camera and photograph how the connectors are located.

This is especially true for the front panel plug. Sometimes they are scattered randomly and it is extremely difficult to put them back in the correct order, especially for beginners.

It is better to take pictures from a different angle and distance. So it will be possible to consider the inscriptions on the plugs and the colors of the wires.
Dismantling the video card.
When the plug is removed, proceed to dismantle the video card. Usually it is large and when you unscrew the mounting screw that secures it to the case, the card will freely hang from side to side, which can damage the connector on the motherboard.
Therefore, we release the fastening latch, which is located on the right, from the bottom of the video card. To do this, feel for it with your finger and press the lever down. In this case, the card as it leaves the slot halfway. Next, just pull it with your fingers, without damaging its elements.

I would like to remind once again that all operations with computer components must be performed first by removing the static from the body. To do this, just touch the heating battery or faucet in the bathroom before doing anything. It is also not necessary to put on woolen and synthetic materials before work. It is better to dress in cotton clothes.
The graphics card, like other components, after dismantling, carefully put in one place. Not on top of each other, but next, and with the main elements up.
If you have a cat, then it is more difficult. Firstly, this is the source of static, and secondly, when you leave, something can fly to the floor. And this is not good. The cat will run away, and you will have to buy a new expensive item. In such cases, you can put everything in a lockable drawer.
If the power supply and processor cooling do not interfere, then remove the motherboard along with the processor. So it’s less likely that when removing the cooler a screwdriver will fly off and pick up the board, and it will also be clear what exactly and where to rotate.
Dismantling the motherboard.
There are screws around the perimeter of the board that must be carefully unscrewed and folded into a separate box. For convenience, we put the system unit on its side, and unscrew the screws one by one with a magnetized screwdriver. After, we check whether they are all dismantled. If so, then when the board moves, it will move freely.

We take with one hand the processor cooler, and the other at the opposite end of the board and gently pull it out.

It is very important not to bend the board, so put it on a flat surface. Now we look at how you can remove the cooling to get to the processor.
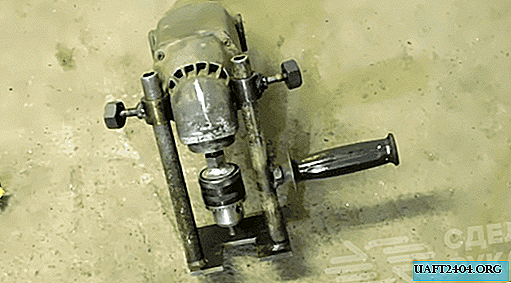
Here in the photo one of the options.

This is a boxed cooler for Intel coket 775 processors.
Everything is very simple here. Turn the screwdriver on the latch 90? and pull it slightly up.

So you need to do on all four mounts. Then just pull the cooler up. It should go out quite easily.
Now you can wipe with alcohol the processor and cooler from thermal paste and apply a new layer before assembly.
North and south bridge.
These are chips on the motherboard that are responsible for certain functions. They also heat up, which can lead to unstable operation of the system. Therefore, on their radiators, it is also necessary to periodically change the paste. The south bridge on cheap motherboards may not have a radiator at all.

Sometimes users stick it on themselves or somehow fix it differently. In any case, this will only benefit the system.
It is easy to remove such a radiator. Depending on the model, the method is different.

But it is usually seen what needs to be done. In this case, you just need to pull on the mounts, squeezing the spacers on the opposite side of the board.

You can do this even with tweezers.

When the struts are released, the radiator will calmly be removed.


Dust removal.
When everything is disassembled, you can carefully vacuum the system unit itself.

Boards such as: motherboard, video card, RAM, CPU cooler and video cards can be blown with a pear for an enema. A very useful thing in such cases, especially if you have animals that scrub their hair everywhere. You will see shreds of this wool on your PC.

In general, you can blow out everything that can direct a point stream of air, for example, a compressor. Just a "pear" is in every home.
You can wipe the boards with a cotton swab dipped in triple cologne. And the smell will be and the dust will go away.

In hard-to-reach places we use a match or a toothpick with cotton wool wound around it.
But you need not to overdo it, not to exert great efforts, so as not to "tear down" some kind of capacitor or resistor. Be gentle with your faithful iron friend.
Assemble the device also, only in reverse order. All connectors should be in place. Difficulties can be with the wires of the front panel. But using pre-made photographs should not be a problem.
That’s probably all. Good luck with your PC.
Share
Pin
Tweet
Send
Share
Send