Share
Pin
Tweet
Send
Share
Send
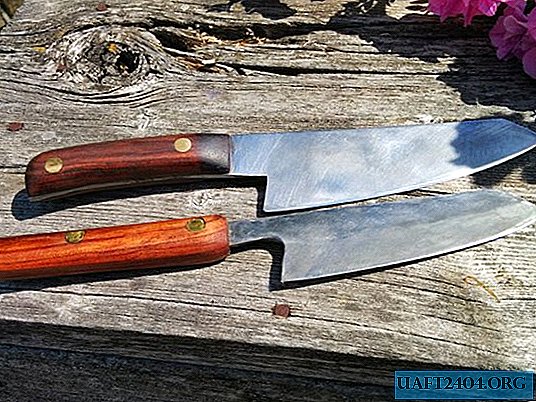


A custom-made knife is the main attribute of most professional chefs and chefs. Its cost can vary from $ 200 to $ 3,000. However, you can make yourself the same for only $ 10, while the work will be done only with hand tools.
I would not call the knife making process very difficult, but the work requires a lot of time and patience, so prepare your favorite audiobooks. Each knife takes about 20 hours to make. There are ways to reduce this time, but then you will have to spend more.
List of steps:
- Selection of materials and / or tools.
- The choice of knife design.
- The choice of steel is based on your needs.
- Shaping a steel sheet.
- Heat treatment of metal.
- Knife sharpening.
- Making a wooden handle.
While working on this project, you will have to work with fairly sharp, hot tools and flammable substances. A sound approach to work should save you any trouble, but please be careful.
Based on the foregoing, let's continue.
Materials and Tools


How to make and use a knife clip
Here's what you need to make a good quality knife:
Materials:
- Steel (I will dwell on this issue in more detail at the next stage).
- Wood.
- Brass rivets.
- Gypsum.
- Iron sieve.
- Gas-burner.
Instruments:
- Metal file (with double notch).
- Hacksaw for metal.
- Hand drill and drill for it (you can use an electric one).
- Permanent marker (with thin and thick rod).
- Scissors for metal.
- Hammer.
- Punch.
- Long pliers.
- Gloves.
- Nozzle (for propane combustion).
- Metal or plastic brush.
- Miter box.
- Saw on wood.
- Sandpaper.
- Clear varnish or stain.
It is also useful to have a file holder.
Steel for knives

The choice of steel on which you stop will greatly affect the final result. This is the most important part of the knife.
Steel is a combination of two substances: iron and carbon. The more carbon is contained in steel, the harder it is. Solid steel can make a thinner and sharper cutting edge of the blade, which will remain so for a long time. However, this will also lead to a decrease in its strength, since such steel will become more fragile.
Historically, these two elements were connected when a blacksmith heated iron in a furnace. The smoke that emanated from the fire (mostly carbon particles) covered the steel and then entered into a compound with it while shaping the iron. And so Damascus steel appeared - the more layers in the blade, the more times they were folded and forged, so the carbon content in it was greater. Today Damascus steel is produced automatically and in quality resembles high-grade stainless steel. It has a characteristic texture that can be emphasized with acid.
With the development of technology over the past few hundred years, you no longer need all the equipment of a blacksmith to make a knife from steel with a high carbon content. Today, suitable metal can be ordered on the Internet.
There are two classifications of steel: stainless and rust.
Stainless steel usually contains at least 13% chromium, which helps to keep it from rust and corrosion. Stainless steel is more difficult to heat treat, especially at home. Therefore, if you want to opt for such a metal, then for heat treatment you will most likely have to use third-party services.
A stainless steel blade contains less than 13% chromium. Such a metal is usually cheaper and it is easier to heat treat it. Knives from it are as sharp as stainless steel. However, these metals are susceptible to corrosion and rusting to a certain extent, therefore they cannot be kept in damp (no more than 20 minutes).
For the manufacture of the first knife, I recommend you use one of two types of steel. Alloy tool steel (HVG) or structural spring steel (grade 85).
Now that you have finally decided on the choice of steel, it is time to decide on the size.
My first knife was 230 x 2.5 x 40 mm from HVG. In its manufacture, I recommend stopping at the thickness and width of the blade mentioned above. You can choose its length at your discretion.
The choice of shape for knives


The shape of kitchen knives may vary depending on their intended use. I chose the West-Japanese kitchen knife. You can find a more suitable form for yourself. I advise you to cut it out of cardboard first to check how it will lie in your hand. Then, if necessary, it will remain possible to change its size.
Once you have decided on the form, you can order a suitable metal. Remember that the larger the knife, the longer you will process it. Therefore, I recommend starting with a small size.
Next, we transfer the contours of the knife from cardboard to metal using a thin marker.
If you use a vice when processing metal, then you will also need a couple of wooden bars between which you will clamp the workpiece. Then there will be no traces of a vice on it.
To cut the primary form, use a hacksaw. It will take a lot of time. If you hold the hacksaw with two hands (one on the handle and the other near the tension screw) and evenly distribute the pressure during operation, the process will go much faster.
Blade Profile Formation


Usually there are two descents in the knife, sometimes three. One goes along the entire blade of the knife, and the second makes the cutting edge. There are many types of profiles, each of which has its advantages and disadvantages. I will focus on the most common, and those that can be formed using a file clamping device.
Wedge profile:
Both sides of the blade rise in a straight line to the butt. A very common profile, as it combines sharpness and resistance to wear.
Five-sided blade profile with a supply:
Such a profile contains three descent ribs. The lowest that is sharpened. Then the middle rib, which extends to the middle of the blade and then comes down at a slight angle or even a flat blade. This profile is not as sharp as wedge-shaped, but it is more resistant to wear and undergoes less friction during cutting.
One-sided sharpening:
Only one side has a wedge-shaped descent. Such a profile is sharper and more accurate, since one side remains flat. It is quite common in Japanese culture. With such sharpening, the blade wears out faster and for those who are not familiar with such a profile, the knife operation may seem unusual. Such a blade is made the fastest, and it is easier to sharpen.
After choosing a blade profile, it's time to start the longest of the processes. For a steel sheet 2.5 mm thick, you will have to devote at least two hours, and the thicker the sheet, the longer it will take to process.
I have some (personal) recommendations:
- The center line of sharpening can be noted using a drill with a diameter equal to the thickness of the workpiece.
- If you are going to do a double descent, after the first treatment, the edge should remain a little thicker than you plan to do it.
- Before each processing step, apply a new coat of paint with a marker.
- Grind with wide working movements. This is important, otherwise you can make uneven recesses in the surface, which can manifest themselves only when polished, and which then will be difficult to get rid of.
- The blank, if possible, is best placed on a wooden bar, so the processed metal will bend less.
- Listen to an audiobook, especially any long one.
- Be patient, and use a file with large teeth.
- Use only a double-notched file, then the likelihood that deep scratches remain in the metal will decrease.
- Brush the knife and file every 2-5 minutes.
Knife blade polishing


Watch the video:
A polished blade not only looks better, but it will also be more protected from corrosion. The smoother the surface, the less likely it is that the water will remain in the recesses and cause stains. For polishing the blade, I used three types of stones. He started with coarse stone (with grain P300-P400), moving to a thinner one (P800) and finished polishing with the thinnest, with abrasive grain P1200. The result of this work will be a brilliant blade, but without a mirror tint.
If you want to bring the result to a mirror surface, or you do not have grindstones, then for this work you can use a skin or damp sandpaper.
The process is famous - just rub the blade against a stone or rub it with sandpaper on a blade. We do this until the surface becomes homogeneous, then reduce the size of the abrasive grain. When working with a donkey, switch from one side to the other so as not to leave them wet for a long time. If it is possible to use a grindstone that can be treated with oil, I recommend using it to avoid stains on the blade. This stage will take a lot of time, but no more than the formation of the profile of the blade.
Drilling rivet holes


To fix the pads on the knife handle, two rivet holes must be drilled in the shank. This is important to do before heat treatment. I recommend a test assembly to ensure that the edges of the raw linings extend beyond the edges of the shank. In order for the drill to quickly cut into the metal when drilling, the place of drilling must be marked with a punch. Then select the drill of the required diameter and drill two holes in the shank. If you use a hand drill, then the risk of breaking the drill will be reduced. For example, I, using an electric drill, broke two. Plus, drilling with a hand drill is slightly longer than working with an electric drill.
Make a bugle


To subject the knife to heat treatment, you will have to heat the metal to the required temperature, at which the internal structure of the metal undergoes changes. This happens at around 750 C. I have seen some people use an acetylene-oxygen mixture burner, but I have not tried this method myself.
Therefore, if you intend to perform the heat treatment yourself, you will need a horn. I think most people would rather want to make it themselves than buy it. Information on how to make a bugle can be found on the Internet. For this you need sand and gypsum. To check the temperature, you can heat the kitchen salt. If it melts, then this temperature will be enough to harden the metal. But if you use a steel grade that is more complicated in terms of heat treatment, you can turn to third-party enterprises for this.
Heat treatment of a knife blade


Heat treatment is the process that reveals the true qualities of a knife. Up to this point, the metal was quite soft and "pliable" for processing. After hardening with a blade, it will be more difficult to work, so check again if everything suits you.
Heat treatment has two stages: first, the steel is made harder, then it is slightly weakened. The second process is called vacation. It will allow the metal to be more resistant to wear (less brittle).
The temperature to which it is necessary to heat the steel for hardening depends on the grade of steel. Typically, the temperature to which carbon steel must be brought is lower than that of stainless steel.
No matter what mountain you decide to use, it's time to start the process. Best of all, when the flame moves to the exit in a spiral, so the metal heats up more evenly. At this stage, gloves will not be superfluous, since you will be in proximity to a source of such high temperature. Periodically change the position of the blade so that it is sure to be uniformly warmed up. Steel will begin to change color. When it turns bright red, hold the magnet to it. If the metal is magnetized, then the blade is not heated enough. If not, then the temperature is just right.
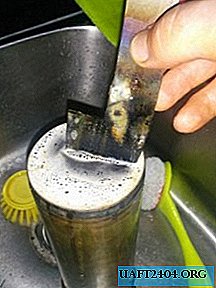
For most tool steels, oil is used as coolant. Waste engine oil is well suited, however, when a hot knife is lowered into it, flames will come out of it. If you do not want to deal with petroleum products, you can use canola or olive oil. However, regardless of the method chosen, be ready and keep a fire extinguisher or box of baking soda nearby. Never try to extinguish a burning oil with water. The amount of oil should be sufficient so that the metal in it can be completely immersed. However, in the manufacture of a kitchen knife, the shank is not necessary to harden. The container must not be made of burning materials. No plastic or wood. I used an old artillery shell.
When you lower the blade into the oil, then move it back and forth, as if you were going to cut something. Do not drive them from side to side, as this may result in a curved blade. After two minutes, the knife can be removed. Be careful, as at this stage the knife has become too fragile and may crack from a slight fall. Wash the blade in soapy water to remove residual oil. Black scales may form on the surface, this is normal. After hardening the blade, try lightly processing it with a file, it should slip and leave only small scratches. If it cuts well into the metal, then you need to repeat the hardening process again.
Now it's time to leave the blade. This process reduces its hardness, but improves the flexibility of the blade. The ratio of hardness and flexibility can be controlled by the height of the temperature and the tempering time. Most steel manufacturers have metal heat treatment tables. Hardness can be measured using the Rockwell scale. For a kitchen knife, this figure should be at the level of 60-64 kgf.
The release of my HVG steel blade took two hours.
After tempering, the blade is finally polished. Everything is done quite quickly, only a very thin top layer is removed with a stone or sandpaper.
Sharpening quality knife sharpening


Watch the video:
Sharpening is an art that needs to be studied hard. Although certain systems of this process have already been developed. One way is to secure the file in a special holder. I do not recommend the use of sharpening tools in which the angle of sharpening of the cutting edge cannot be changed. Most likely, he will not be suitable for our option.
I sharpened my knife in a very traditional way. He drove a blade along the donkey without changing the angle of inclination of the blade. This is not as difficult as it may seem, because you choose the angle of sharpening, and you will know how to hold the blade. The smaller the angle, the sharper the knife will be, and the more fragile the cutting edge will be. Having heard a hissing sound during operation, we turn the blade over and work on the other side. Only this time do less movements. Continue to change sides and reduce the number of working movements (up to three on each side). After that, go to the stone with a smaller grain of abrasive. I am finishing sharpening my knives on a stone with P8000 grain.
I would recommend sharpening the knife (at least partially) even before sticking the grip on the handle.Small particles, which are formed as a result of work on the donkey, can be eaten into wooden lining, changing their color.
Handle making, finishing touches


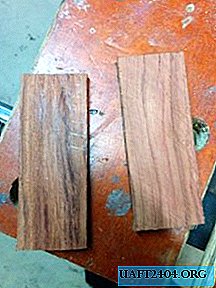


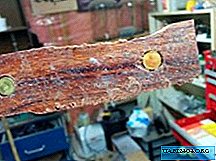

Depending on the chosen style of the knife, you may want to hide the shank in the handle, or, more common, put overlays on it. At my knife, the handle is made in the second way, when the wooden plates are ground together with the shank and fastened with rivets.
Start by cutting wood, preferably hardwood. It is best when the tree has a larger texture of annual rings, and the thickness of one lining is from 5 to 10 mm. Depending on the dimensions of your knife, you can change their thickness. Having decided on the size, use the miter box to cut the lining of the same thickness. In relation to other measurements, accuracy is not needed at this stage, the main thing is that the pads protrude behind the shank.
After the linings are cut out, align them on the shank and mark where the rivets should go. Then drill these holes. Start with a drill with a thickness equal to the diameter of the rivet head. The hole needs to be made a little deeper than the height of the head. The rest of the hole must be made with a drill bit slightly smaller in diameter than the thickness of the rivet. Thus, the pads will be more securely attached.
Now it's time to insert the rivets into the handle and fasten the linings to the shank (which are still more like bars). Using a vise, press the rivets into each other until they are flush with the tree (so less time will be spent on them to grind). Then hold the nail upside down in a vice. Place the handle of the knife so that the rivet is on the head of the nail. On the opposite side, similarly place the other nail head down on the rivet. Hit the top nail, thus deepening the rivets in the handle, to the depth of the wider hole.
After that, use a jigsaw to saw off the excess pads. Then, for more precise work, you can give the tree the desired shape with a sharp knife. His blade copes with this task quite accurately, then you just need to wipe everything with sandpaper.
Usually I make the back of the handle thicker, and the front parts of the lining smoothly descend to the blade. Then you can immediately apply a transparent varnish to the handle, or treat it with sandpaper with grain P220.
When the wood is smooth enough and the grip is comfortable to hold in your hand, you can apply a stain or varnish, depending on the type of wood you are using. If you like the look of wood texture, then apply varnish, which will help protect the handle from moisture and chips. When the tree is quite smooth, with the help of the remaining pieces of the breed, you can experiment with choosing a stain. After a coat of stain, apply a clear varnish.
Now your quality kitchen knife is ready
You have just saved an impressive amount and now you can enjoy using the high quality knife that you made. Thanks for your attention!
Original article in English
Share
Pin
Tweet
Send
Share
Send