Share
Pin
Tweet
Send
Share
Send
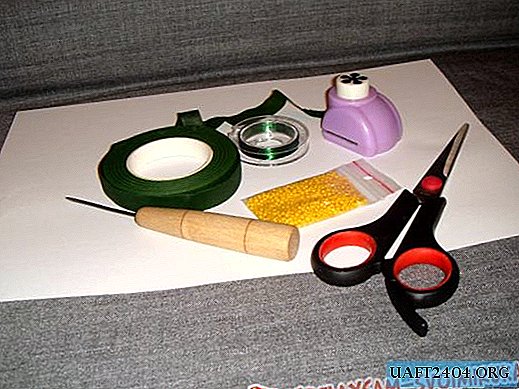
What materials will be needed
- - dense, but not hard leatherette with a size of 150 by 90 cm;
- - Lining fabric 120 to 36 cm in size;
- - strong (preferably reinforced) threads in tone of the main material;
- - a zipper 14 cm long for a pocket;
- - stitched insulation (batting or synthetic winterizer) measuring 65 by 13 cm;
- - a cord with a length of 120-140 cm per tone dermatina for fastening;
- - a cord with a length of 45-50 cm to strengthen the straps;
- - a clamp for a cord;
- - a pair of strong metal staples.
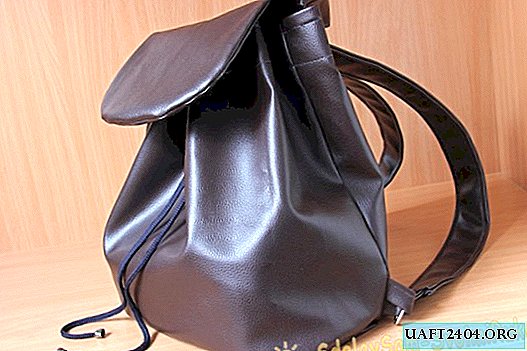
We sew a backpack from a leather substitute with our own hands

A paper pattern should be done only for the valve and the bottom of the backpack. We cut the valve on the base of a square of 20 by 20 cm, smoothly rounding its outer side. We cut the bottom on the basis of a rectangle measuring 32 by 18.5 cm, also rounding off all the corners. The circumference of the resulting oval of the bottom is 88 cm.

From the lining fabric we cut out the bottom and the main part measuring 88 by 30 cm. The allowances for the seams of the lining are 1.2 cm.

From leatherette cut:
- - bottom;
- - 2 details of the base measuring 33 by 33 cm and 33 by 55 cm;
- - 2 straps 62 by 9 cm;
- - 4 loops 8 by 4 cm for fixing brackets;
- - 2 valves;
- - a top obtachka 4,5 on 88 cm.
Seam allowance for parts made of leatherette 1.5 cm.

We fold all the loops two times outward, we again twist the allowances so that they disappear inside the loops. Having departed 3-4 mm from the tucked edge, we sew the loops, inside we stretch the cord.

We bend two loops in the middle to fix the brackets. We adjust obliquely rolled loops on a smaller part of the base, backing down from below 2 cm.

We sew along the front side of the leather substitute, using a special foot for the skin, sliding on the surface. We bend the next pair of loops, grabbing the bracket, and adjust to the short edge of each strap so that in the finished form the loops "flatten" by 4 cm, occupying half the width of the strap detail.

We fold the strap in half, facing outwards, by placing a strip of soft insulation inside. We sew the details, retreating from the fold of 5 mm.

Without interrupting the line, we shorten the short open (upper) section of the webbing, bend inward the edges of the long sections of the leatherette. We cut off the rest of the insulation.

We cut the folded sections of the strap, also retreating from the edge of 5 mm. We carry out these operations on both future backpack handles.

We put on the minimum indicator the presser foot of the sewing machine. On the lower section of the strap, we twist the dermatine allowance inward and shorten the details.

We concentrate the side seams of the base parts by folding them inward.

On one part of the valve, draw an entrance to the pocket. In length and width, it is slightly larger (a couple of millimeters on each side) than the length and width of the teeth of the selected zipper.

Having put thick cardboard under the valve part, with a blade under the ruler we cut the entrance to the pocket. Rounded edges can be cut with thin manicure knives.

We cut the valve with a zipper using the special foot of the sewing machine. We work on the face of the valve.

Having folded two valves with their faces inward, we shorten the parts along the entire rounded part, that is, 3/4 of the perimeter. Through the remaining open slice, we turn out the valve that will serve us as the hidden pocket of the backpack.

The handle of the backpack is treated similarly to the straps, placing the insulation inside. Leave short slices open. In the middle of the top of the smaller part of the base, we adjust the upper edges of the straps and the handle. We place them slightly at an angle to the cut of the main part, so that when carrying the handles do not deform.

On top of the handles, we configure the open sections of the valve folded together so that the pocket zipper is inside the finished backpack.

We shorten the bottom of the backpack with the lower circle of the main parts, folding them inward.

On the upper circumference of the main parts, sew a hem. We begin to tune the sharpening, placing its edge 2 cm further than the previously stitched valve, so as not to create an extra thickening. We carry out a side seam of a facing after having sewn it on a basis of a product.

We wipe all sections of the details from the lining fabric on the overlock. We perform a side seam of the base part. We attach the bottom only half to subsequently turn the product. We trim the hem with the detail of the base from the lining, folding it with the front sides inward. We monitor the correspondence of the location of the oval bottom of the lining and leatherette.

We turn out the lining, as if removing it from the backpack.

Close the lining that remains open with the face (base with bottom).

We stretch the whole lining into the backpack itself. We lay the finishing (and at the same time fixing) stitches, connecting the hem to the base, departing 1 cm from the top edge of the backpack. Another line connects the top of the lining (grabbing the lower edge of the hem under it) with the base of the backpack.

Between the resulting finishing lines we break through the blocks (in the workshop for repairing leather goods) for pulling the cord. Two in the middle on the front side of the backpack at a distance of 12 cm from one another. The following blocks after 6.5 cm, then 3, 7, 3 and 12 cm. Between the two blocks located in the middle of the back should be 13 cm. In total 12 holes will be obtained. We extend the cord through the openings of the blocs, and its ends into the latch, which will hold the tightened cord motionless, preventing the backpack from opening. Although you can simply tie the ends of the cord without using the retainer.

To prevent the cord from opening, tie its edges to a knot, decorating with decorative bells. We use our own hand-sewn accessory for its intended purpose.

Share
Pin
Tweet
Send
Share
Send